
Original PS3 remotes are scares nowadays and seeing that the PS3 is now almost 15 years old and Sony has stopped manufacturing them for a while now. Chances are that you might have an old PS3 remote that is not functioning as it should, or might be completely haywire (without touching any buttons on the remote) as indicated in this video:
The only thing left to do is to try and open it up and see if there is something obvious that is wrong with it or if a good cleaning might fix it.
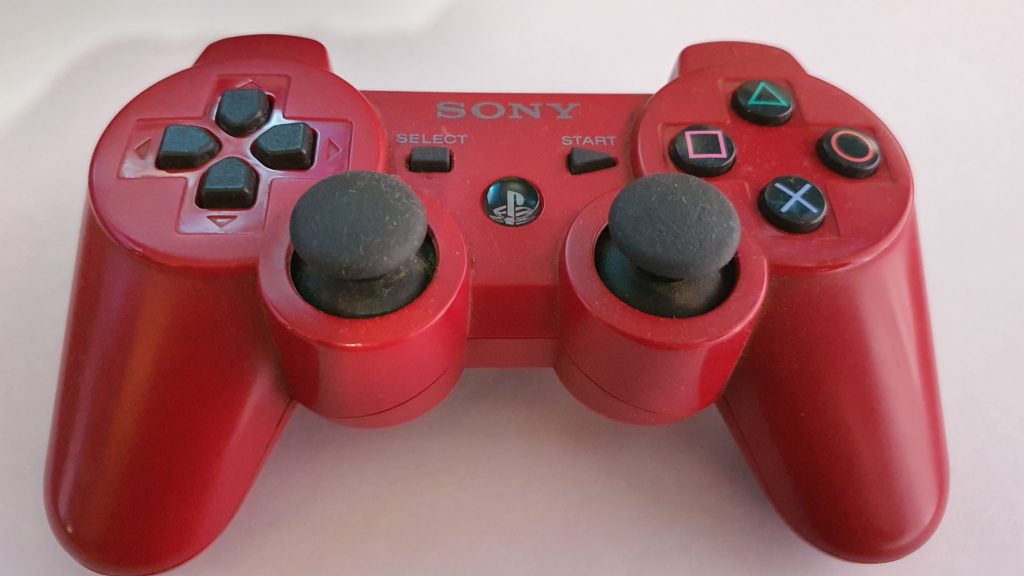
As with most of these remotes, a good cleaning is usually necessary as with the culprit in the picture below which was bought second hand:
Disassembly
Taking apart the remote is really simple as long as you don’t force anything as there are some fragile parts inside.
Step1: Remove Screws
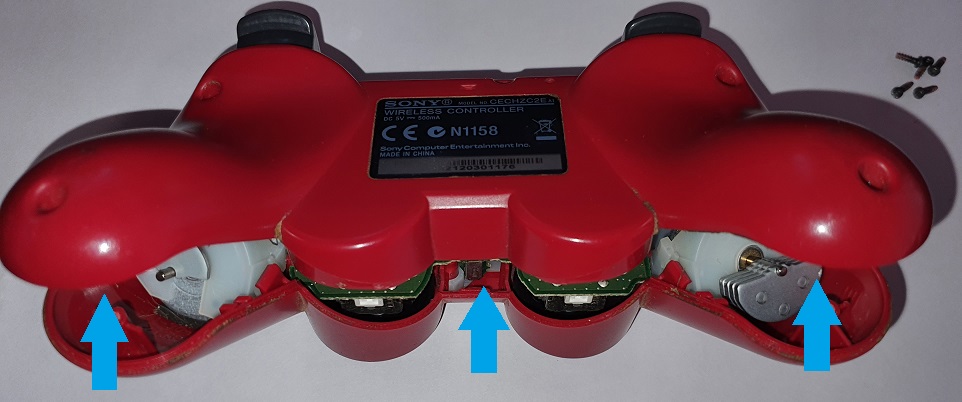
Remove the five screws as indicated in the picture below:

Step 2: Pry Open
Pry open the remote from the bottom and lift on the left and right sides, then the center. It might be good to have a plastic prying tool handy, but your fingers should do the trick. Be careful to not damage the trigger buttons as you lift the bottom up and out:
Step 3: Removing the Battery
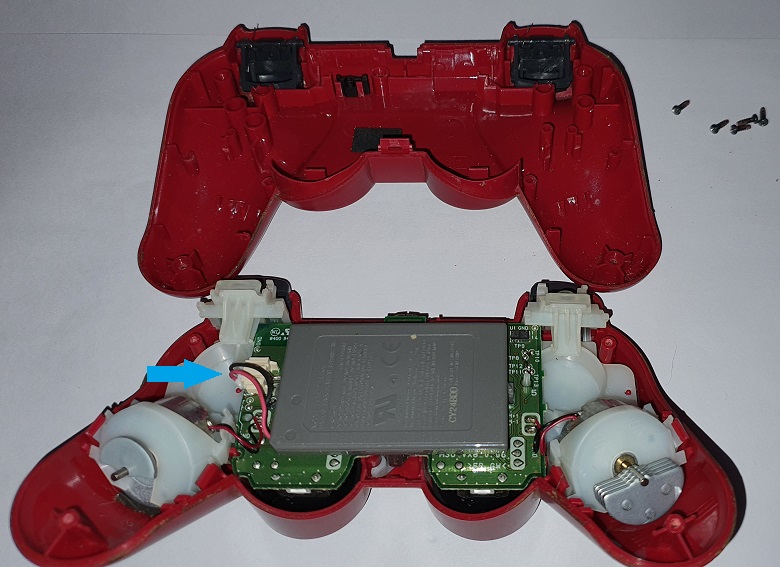
The next step is to remove the battery, by carefully pulling on the connector (not the wires) as indicated in the picture below:
Step 4: Removing the Final Screw and Trigger Buttons.
The next step is to remove the trigger buttons carefully and the bracket for them. Be careful as there are a touch sensitive circuit between the push buttons and the bracket.
Also remove the last screw as indicated below. Be weary to strip the screw head as they are usually fastened with Loctite or similar.
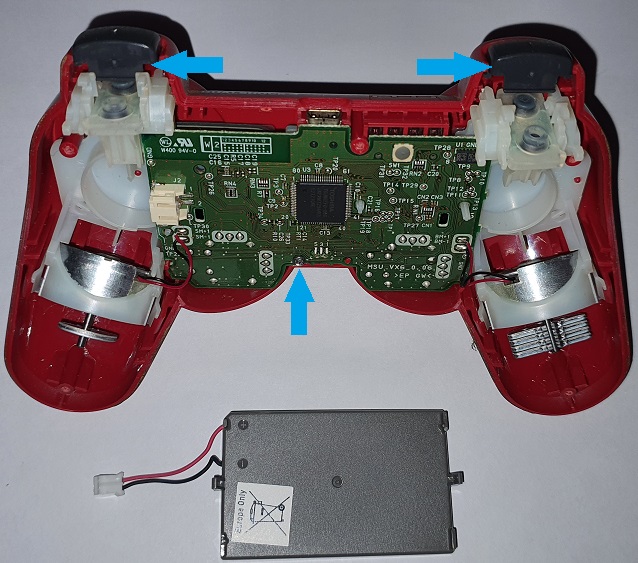
…and if you are not careful it strips:

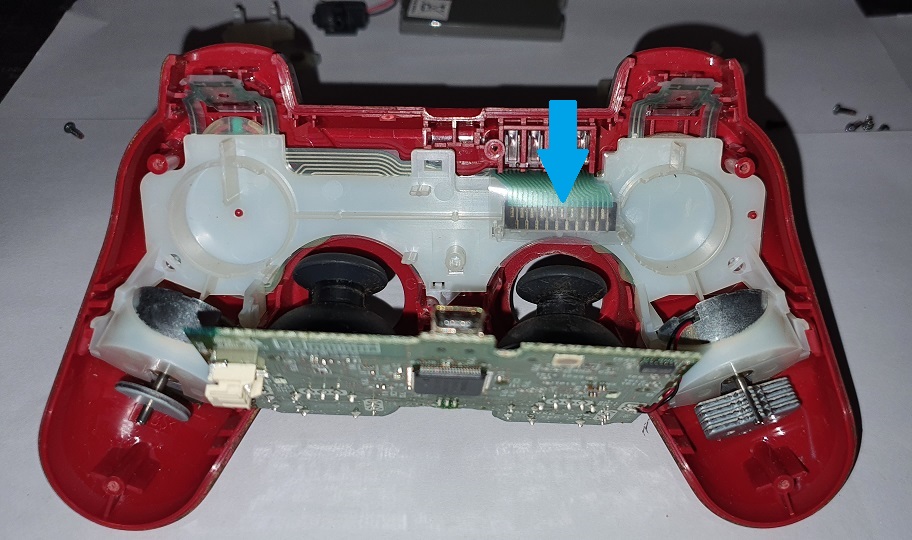
Step 5: Remove the Circuit Board
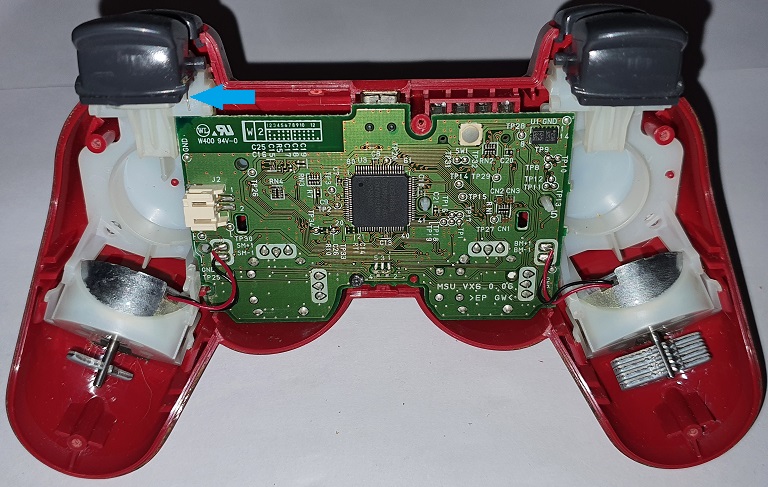
Next its the circuit board that has to be removed, even slightly to be able to clean both sides, but be carful of the wiring to the circuit board and the attached motors. It is possible to clip-out the vibrating motors, but in this case it was not required. The connection in the picture below is the one we want to focus on with the cleaning as well as its counter part on the circuit board.
Step 6: Cleaning
Next the cleaning starts. It is best to use an electronic cleaner, but in this case a set of earbuds and rubbing alcohol was used to cleaning the connectors as well as any dirt on the controller parts. Be careful of unknown products as some can damage the plastics and rubbers. It is also a good idea to check the condition of the rubber underneath the connector pins indicated in the picture above.


It is also a good idea to remove the analog sticks and clean in and around them as they always collect dirt/dust etc.

Step 7: Reassembly
The next step is to put everything back the way it was. Be careful of the assembly of the trigger buttons, the contact circuit between the rubber push-buttons and the bracket, as well as their springs as indicated below. Test the triggers to feel if their movement normal, before closing the controller.
Remember the battery and make sure the connector seats properly.

Finally the back cover and the screws holding it in place. The trick is to insert the back cover over the triggers first and then towards the handles of the controller. Make sure everything “clicks” into place, before inserting the screws.
Step 8: Testing
The final step is to test and see if the clean was successful. In this case it was as can be seen in the video below, so it is definitely worth a shot if you are still into PS3 consoles, or if you want to sell yours.